The next few instalments lead up to the flocking example you see in the video above.
In this lesson we’re going to look at using storage buffers on the GPU, creating a customized vertex shader and creating custom geometry. We’re creating this
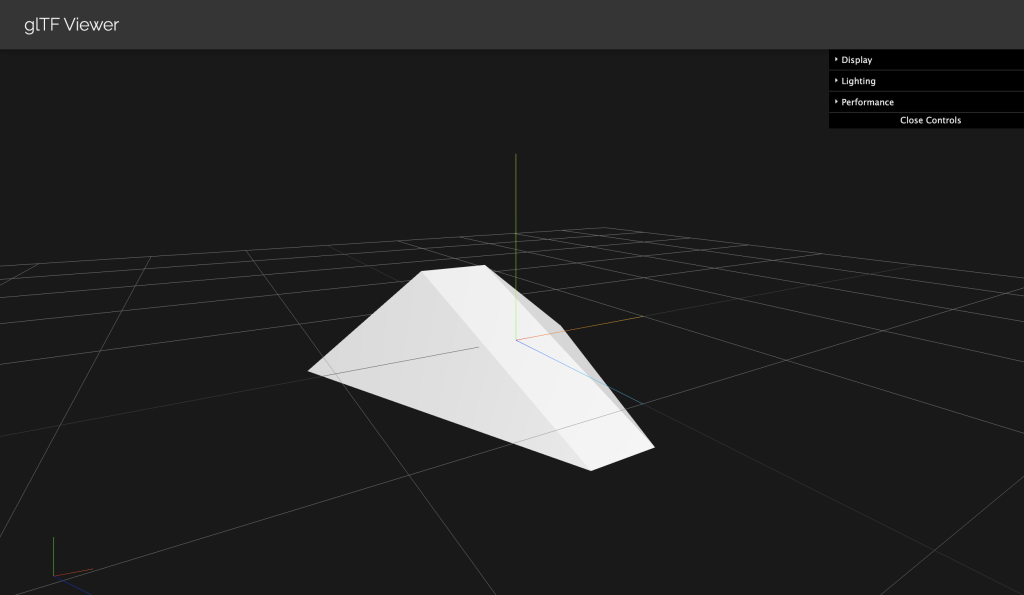
Doesn’t look like much but there is quite a lot going on. Press the JS button to see the code. Take a look at the loadGLB function.
loader.load(`${name}.glb`, (gltf) => {
    boid = gltf.scene.children[0];
    const scale = 0.2;
    boid.geometry.scale( scale, scale, scale   );

    tsl();
  });
This loads a GLB file.

The mesh we’re interested in is the first child of the gltf scene. We assign that to the app variable boid. Why boid? Because Craig Reynolds used the term Boid in his classic SIGGRAPH Paper that simplified the behaviour of a flock of birds.
We scale down the geometry then call the tsl function.
The first step of the tsl function is to assign positionStorage by calling the function initStorage. The purpose of this function is to create an array of data on the GPU. We first create a JavaScript typed array of Float32s. The array length is the app constant BOIDS multiplied by 3. We multiply by 3 because a position uses 3 floats. Then we initialise the values in the array. The index for each position in the array is set as the offset value i times 3. For each boid we set the x value, that’s offset and the y value, offset plus 1. We can leave the z value as zero. Then we create a named attributeArray. The JavaScript array values are uploaded to the GPU.
function initStorage() {
  const positionArray = new Float32Array(BOIDS * 3);

  const cellSize = 0.5;

  for (let i = 0; i < BOIDS; i++) {
    const offset = i * 3;
    const row = (i % 3) - 1;
    const col = (~~(i / 3)) - 1;
    positionArray[offset + 0] = col * cellSize;
    positionArray[offset + 1] = row * cellSize;
  }

  const positionStorage = attributeArray(positionArray, "vec3").label(
    "positionStorage"
  );

  // The Pixel Buffer Object (PBO) is required to get the GPU computed data in the WebGL2 fallback.
  positionStorage.setPBO(true);

  return positionStorage;
}
The next step in the tsl function is to define a vertex shader using TSL. But before we look at this slide up to see the definition of the FlockGeometry class. This class constructor receives the geometry of a single boid. In the function we copy the geometry BOIDS times. It is essential for our purposes that the geometry is not indexed. So we call the method toNonIndexed. BufferGeometry can store each triangle as consecutive 3 vertices or use an array of indices that describe how to source the vertex data. If indices are used then each 3 entries in the index array give a reference index into the vertex array. Suppose the first 3 entries in the array are 0,1,8. Then the engine will use the vertices from the vertex array at position 0, 1 and 8. But we want to provide each vertex with an instanceID that defines which boid this vertex belongs to. For this we need a flattened vertex array.
Next we get position and normal BufferAttributes from the source geometry. We set a count constant to the position attribute count property and total to the count value multiplied by the number of BOIDS. Then we create 3 new instances of the BufferAttribute class
- posAttr: will hold the position values of each vertex in the flock. Its size is total times 3 and the itemSize is 3.
- normAttr: will hold the normal values of each vertex in the flock. Its size is total times 3 and the itemSize is 3.
- instanceIDAttr: will hold a reference to which element in the positionStorage buffer the current vertex relates to. Its size is total and the itemSize is 1.
We assign these attributes to the class, giving them the names position, normal and instanceID.
Then we populate the arrays. For the position and normal attributes we copy data from the source boid. We do this BOIDS times. Each iteration we update the offset into the arrays, for position and normal this is b times count times 3. For the instanceID array it is just b times count. Because the itemSize of the array is just 1. Every entry in the instanceID array is the current boid index b.
After looping through the data, the attribute arrays for FlockGeometry will contain BOIDS copies of the source geometry. With the additional instanceID array containing the index 0 for the first loop, 1 for the second, 2 for the third etc. Now for every vertex we can get a reference to the positionStorage array.
lass FlockGeometry extends THREE.BufferGeometry {
  constructor(geo) {
    super();

    const geometry = geo.toNonIndexed();
    const srcPosAttr = geometry.getAttribute( "position" );
    const srcNormAttr = geometry.getAttribute( "normal" );
    const count = srcPosAttr.count;
    const total = count * BOIDS;

    const posAttr = new THREE.BufferAttribute(new Float32Array(total * 3), 3);
    const normAttr = new THREE.BufferAttribute(new Float32Array(total * 3), 3);
    const instanceIDAttr = new THREE.BufferAttribute(new Uint32Array(total), 1);

    this.setAttribute("instanceID", instanceIDAttr);
    this.setAttribute("position", posAttr);
    this.setAttribute("normal", normAttr);

    for (let b = 0; b < BOIDS; b++) {
      let offset = b * count * 3;
      for (let i = 0; i < count * 3; i++) {
        posAttr.array[offset + i] = srcPosAttr.array[i];
        normAttr.array[offset + i] = srcNormAttr.array[i];
      }
      offset = b * count;
      for (let i = 0; i < count; i++) {
        instanceIDAttr.array[offset + i] = b;
      }
    }
  }
}
Back to the tsl function. We were reviewing the vertex function. In the function we are going to set the homogeneous clip space position of the vertex. A vertex shader works on a single vertex at a time. GPUs work on many vertices simultaneously. Notice we get the instanceID. We a multiply positionLocal by the modelWorldMatrix. Then we add the value in the positionStorage attributeArray at index instanceID. Remember for each vertex in a block of vertices which when rendered will give the triangles of a single boid, the number of the instanceID will be the same. We store this value as finalVert. To change this to homogeneous clip space we then multiply by cameraViewMatrix and cameraProjectionMatrix.
const flockVertexTSL = Fn(() => {
    const instanceID = attribute("instanceID");

    const finalVert = modelWorldMatrix.mul(positionLocal).add(positionStorage.element(instanceID)).toVar();

    return cameraProjectionMatrix.mul(cameraViewMatrix).mul(finalVert);
  });
It just remains to use the FlockGeometry class we reviewed earlier, to create the geometry. The constructor needs the loaded boid geometry. Then we create a new material and assign the flockVertexTSL functio we saw earlier to the vertexNode. Create a Mesh from the geometry and the material.
  const geometry = new FlockGeometry(boid.geometry);
  const material = new THREE.MeshStandardNodeMaterial();
  material.vertexNode = flockVertexTSL();

  flock = new THREE.Mesh(geometry, material);
  scene.add(flock);
And we have 9 copies of the original boid object. But we have only a single object in our scene. Each boid is positioned using the positionStorage attributeArray.
In the next instalment we’ll learn how to create functions that run on the GPU and can update storage buffers.
If you find these articles useful, perhaps you can buy me a coffee by clicking the button below. It might encourage me to write more.
Signup to my mailing list.
